Fruit splash photography is very fun. everyone likes pictures of glowing fruit amid flying water droplets that glitter and sparkle like small crystals. However, very few people know that it’s very easy to take such a dynamic photo by yourself and that it is also very entertaining. For this, we don’t even need a flash, just a sunny day in the garden, a floral wire, a black blanket, a reflector, and possibly a tripod. Oh yes … and fruit too, of course.
Initial steps for fruit splash photography?

I would like to briefly explain to you how I do this. First of all, you have to choose which background you want to have. You can of course be creative. It should be noted, however, that a rather dark background brings out the drops better and the colors of the fruit also appear brighter. The best way to do this is to go outside because nobody is bothered by the splashing water here. It is also an advantage when the sun is shining because it replaces the flash with its hard light, which means that the drops are later depicted with high contrast and sharpness.
I opt for a black background and simply the use of a blanket. I hang it up in front of me so that the sun is behind the blanket and it is therefore not illuminated. This is important so that the background is as black as possible.
How to hang fruits?
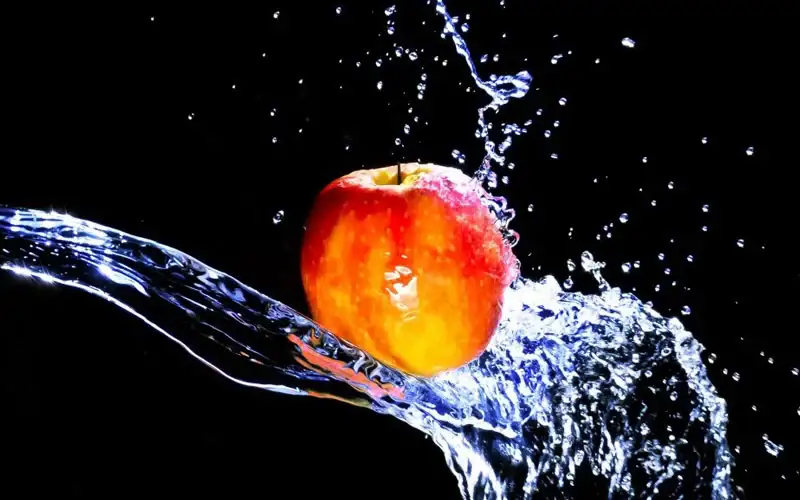
Now I prick an apple from above with a floral wire and make a small knot at the end of the wire so that the apple cannot slip down. Of course, this also works with other fruits. Now I hang the apple so that it is at a comfortable height for taking photos. It should be positioned so that the sun can illuminate the apple, and also the water effect, from behind.
Time to shoot!
Now let’s get into position with our camera. We let the apple oscillate and then focus on it manually. It would of course be ideal to use a tripod So you can take care of the rest in peace, and your hands are also free. The tripod fulfills another task: Since the front of the apple would be much too dark, we use a silver reflector to reflect the sunlight directly back onto the apple So If you don’t want to hold the reflector in your hand, you can lean it on the tripod or attach it with a little skill. In any case, the ceiling behind the apple should not be illuminated. If that is the case, then you should simply bring the reflector to a different angle to the apple, e.g. illuminate something from below.

A slightly longer focal length is suitable for such photos; I recommend 70-150mm. So if you use a normal compact camera for this experiment, it is helpful to zoom in on the object. The nice thing about this photo installation is that you can take pictures with almost any camera if you can set a fast shutter speed.
Now we are approaching the exposure. What we know is that we want to “freeze” the water as it moves. You need a very short shutter speed for this, I recommend 1/2000 sec or less. We set the ISO as low as possible, but as high as necessary, that depends very much on the ambient brightness. It is the same with the aperture: Here I start with a medium aperture, for example, f 8.0. If we open the aperture further, we might get too little depth of field. These setting apply for any other object the only thing that changes slightly is the lightining.
The main thing is that we set a fast shutter speed. The rest can be determined according to taste and lighting situation.
The tricky part is timing!

Once everything is set up, the camera is on the tripod, and the manual focus has been adjusted (not always possible with compact cameras, every image has to be re-focused), you can start. get a bucket full of water then fill your mug and throw it on the apple. with the other hand Keep your finger ready on the shutter release when the water hits the fruit and splashes apart, then you should react quickly and press the trigger. The sequence is automated in: “throw, splash, press” over and over again. If you don’t want to rely on your timing, you can also switch your camera to series picture mode and “continuous fire” after pouring. With 10 frames per second or more, you get a very good yield. This method has the advantage that you hardly miss a splash, but unfortunately, the disadvantage is that you have to look through a lot of pictures afterward to find the best one. If you use remote control, You will have the comfortability of throwing the water from the side in your fruit splash photography.
Golden Rule of post-processing

If you only take raw photos, you will not achieve great results. For a better result, the golden rule is post-process the photos. For this, you need at least the entry-level version of Photoshop, namely Photoshop Elements. But it also works with Lightroom and other programs.
First, you start by brushing the background darker. The “Post-exposure” tool is suitable for this. We set the area setting to “Depths” so that the brush does not affect the water drops. Now we brush over the black blanket until it becomes homogeneous, deep black surface. Then we remove the floral wire with the copier stamp. If you want, you can color the water a bit to get more freshness in the picture. I hope this Fruit splash photography tutorial gives you a good idea of how to take amazing photos from fruit.


